
Printer troubleshooting: start with a test page
Most printer troubleshooting is guesswork with a receipt attached. A cartridge gets replaced, then a cable, then a driver, and at no point does anyone establish what is actually wrong. Printing one test sheet first turns the whole exercise around: you get a picture of what the printer is doing, and each fault on that picture points at a short list of causes.
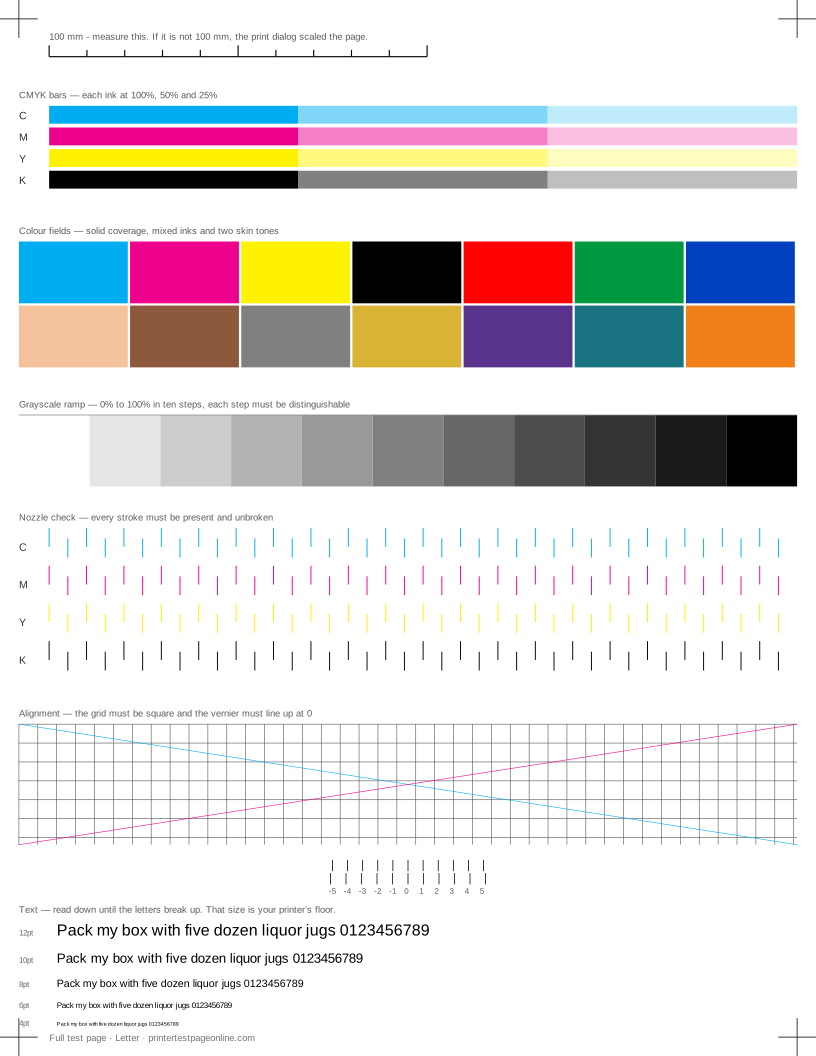
Work in this order. Print the full test page. Find the block that looks wrong. Read the causes for that fault, cheapest first, and change one thing at a time — reprinting the same sheet between changes so you can see what moved.
Step 1: does anything come out at all?
If no paper moves, the problem is not print quality and a test page will not help yet. Check that the printer is powered and not showing an error, that paper is loaded and the tray is seated, and that the job is not sitting in a stalled queue. A queue with a stuck job at the front silently blocks everything behind it.
If paper moves but comes out white, the printer and the computer are talking and the fault is in the ink or toner path. That is a blank page, and it has its own short list.
Step 2: is it the printer or the computer?
Print the printer’s own self-test from its front panel — most have one under Reports or Maintenance, and many will print one if you hold a button while powering on. That page never touches your computer.
If the self-test is clean and the page from this site is not, the fault is in the driver, the connection or the settings. If both are bad in the same way, it is the printer. This one comparison eliminates half the possibilities in under a minute.
Step 3: read the sheet
Each block on the test page reveals a different failure. Gaps in the nozzle check mean blocked nozzles. A missing CMYK bar means an empty, unseated or clogged channel. Lines across the solid black mean nozzles on an inkjet and a roller or drum on a laser. Banding on the grayscale ramp means feed or supply. A vernier reading away from zero means head alignment. Clipped crop marks mean the print dialog scaled the page.
The table below covers the three faults people arrive with most often. Each one has a page of its own with the full sequence.
Step 4: change one thing at a time
This is the rule that saves the most money. Run one cleaning cycle, not three. Replace one cartridge, not a set. Reprint the same test page after each change and keep the sheets in order. When the fault clears you will know what cleared it, which matters the next time it happens.
Write the date on each sheet. A printer that degrades slowly is impossible to judge from memory and trivial to judge from two dated prints.
When to stop and replace the printer
A clog that survives three cleaning cycles and a night of rest, on a printer whose head is not user-replaceable, is usually the end. So is a fuser fault on a cheap laser and a drum fault on a printer whose drum costs more than half a new machine. Knowing what the fault is makes that call straightforward rather than a guess — which is the reason to print the sheet before spending anything.
Causes, cheapest first
Horizontal streaks or lines across the solid blocks
| Cause | What to do | Applies to |
|---|---|---|
| Partially clogged nozzles (inkjet) | Run one cleaning cycle and reprint the solid-black block. | inkjet |
| A marked drum or dirty transfer roller (laser) | Note how far apart the lines repeat — a regular repeat points at a roller of that circumference. Replace the drum unit if the repeat matches it. | laser |
| Paper dust or debris on the print path | Power off, open the paper path and clear dust with a dry lint-free cloth. | both |
Everything prints pale or washed out
| Cause | What to do | Applies to |
|---|---|---|
| The driver is set to draft or eco mode | Set quality to Normal or Best in the print dialog and reprint. | both |
| Ink or toner is low | Replace the low cartridge. Shaking a laser cartridge side to side buys a few more pages, not more. | both |
| The driver is set to the wrong paper type | Match the paper setting to what is loaded; plain-paper settings lay down less ink on photo stock and vice versa. | both |
The page came out completely blank
| Cause | What to do | Applies to |
|---|---|---|
| Tape or a seal is still on a new cartridge | Pull the cartridge and check every tab before anything else. | both |
| The head has dried out after a long idle period | Run two cleaning cycles an hour apart; if the nozzle check is still blank, the head needs servicing. | inkjet |
| The job went to a different printer or a virtual one | Check which printer the job went to, and that it is not set to print to file or to a PDF writer. | both |
More troubleshooting
Frequently asked questions
What is the first thing to check when a printer prints badly?
Print a test page and look at it. Every decision after that is better informed, and it takes one sheet of paper.
How do I know if the problem is the printer or the computer?
Print the printer’s own self-test from its front panel and compare it with a page printed from the computer. If the self-test is clean, the fault is in the driver, cable or settings.
Should I reinstall the driver?
Only after the test page says the printer itself is healthy. Reinstalling a driver to fix a blocked nozzle wastes an afternoon and changes nothing.
Is it worth repairing a cheap printer?
Compare the part with the price of the machine. A set of cartridges or a drum unit often costs more than half of a budget printer, which is why identifying the exact fault first matters.